Beauty lies in simplicity and elegance, and there is nothing more elegant than a delicate origami rose. Hand-made DIY roses make for thoughtful and personalized gifts, and with a few simple folds and tucks, you can create a bouquet that will never wilt. This article will walk you through five DIY origami ideas that are perfect for any occasion. From the classic single-stem rose to intricate and eye-catching designs, you’ll be sure to impress friends and loved ones with your exquisite origami flowers.
Popular Origami Rose DIY Ideas
1. The Classic
The first rose on our list is the classic origami rose. This timeless design is a great starting point for beginners and looks elegant without being too complex. You’ll need a square piece of paper and a pair of scissors to get started.
2. The Kawasaki Rose
The Kawasaki Rose is an elegant and intricate design created by Toshikazu Kawasaki, a renowned origami artist. This beautiful paper sculpture is perfect for those who are up for a bit of a challenge and want to create a truly unique and impressive piece.
3. The Ribbon Origami Rose
The Ribbon Origami Rose transforms ordinary gift-wrap ribbon into a stunningly beautiful rose. This design is perfect for those who want to add a special touch to their gift-wrapping or create unique bouquets of stunning paper roses.
4. The Money Origami Rose
Why not add an extra touch of creativity and generosity to your next monetary gift by folding the bills into charming origami roses? The exquisite Rose not only offers a unique and memorable way to give cash gifts but also doubles as a fun and one-of-a-kind keepsake.
5. The Magic Cube Rose
The Magic Cube Rose is a visually stunning and complex design that features a cube-like structure at the heart of the rose. This piece is perfect for those who are looking for a challenge and a truly unique and impressive design.
The Magic Cube Rose is a complex and stunning design that will undoubtedly set your origami DIY game apart.
Examples of Origami Rose DIY
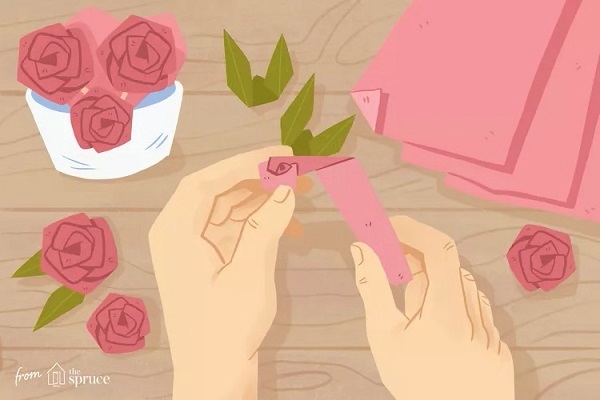
Origami Rose in Bloom
While searching for traditional wedding anniversary gifts, I stumbled upon pictures of origami roses that make a wonderfully romantic present for girlfriends, fiancées, wives, or even moms. Crafting an origami rose requires time and effort, making it a truly cherished gift. And for those who understand the meaning behind different colored roses, I’ve included a guide to help you choose the perfect one.
source
How to Make an Easy Origami Rose
While origami roses are popular, some designs are not suitable for beginners due to their complexity. The Kawasaki rose, for example, is a beautiful design but has 29 steps and can be intimidating for beginners. However, the article provides a simple modification of a traditional model for an easy origami rose that even children can fold, although attention to detail may be required for tiny folds.
Origami is the art of paper folding, and making an easy origami rose is a great place to start. To begin, select a piece of paper that is easy to fold, such as origami paper or printer paper. Then, watch a tutorial on how to make an easy DIY. It’s important to follow the instructions carefully, so take your time and don’t rush the process. You’ll need a few tools, such as a ruler and scissors, and materials such as glue and colored pencils. Begin by folding a blintz base, then form a double or triple blintz to create the center of the rose. Next, make the petals and begin folding the leaves. Finally, complete your origami DIY and admire your work! A fun fact about origami is that it originated in Japan and has been practiced for centuries as both an art form and a way to teach math and geometry.
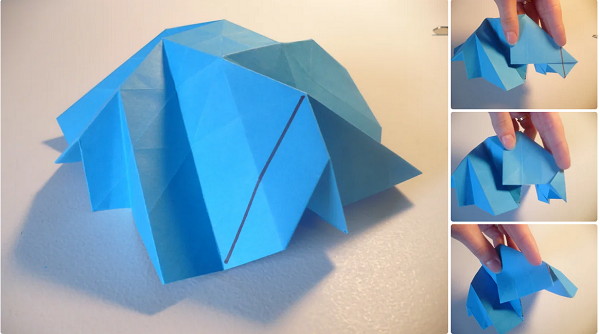
Folding Instructions for a 3D Rose
Surprise your loved one with the best gift ever – a beautiful origami rose! This gesture of love and devotion will surely be appreciated. To help you create this masterpiece, we have provided folding instructions for a 3D rose. Please note that these instructions are designed to be used with the accompanying video, as some of the folds can be challenging and are best learned by being shown directly. Happy folding!

- Make the creases as shown in the diagram.
- Form the four corners of the rose.
- Flatten the model while rotating it counter-clockwise.
- Turn the model over.
- Form the 3D rose by taking each top right corner and folding it to the next quadrant, counter-clockwise.
- Form the rose within the palm of your hand.
- Turn the model over and smooth the inside of the rose by pressing down slightly at the base.
- Turn the model over again, open the center of the flower, and smooth it out.
- Roll the petals down to curve them.
- Your rose is now complete!
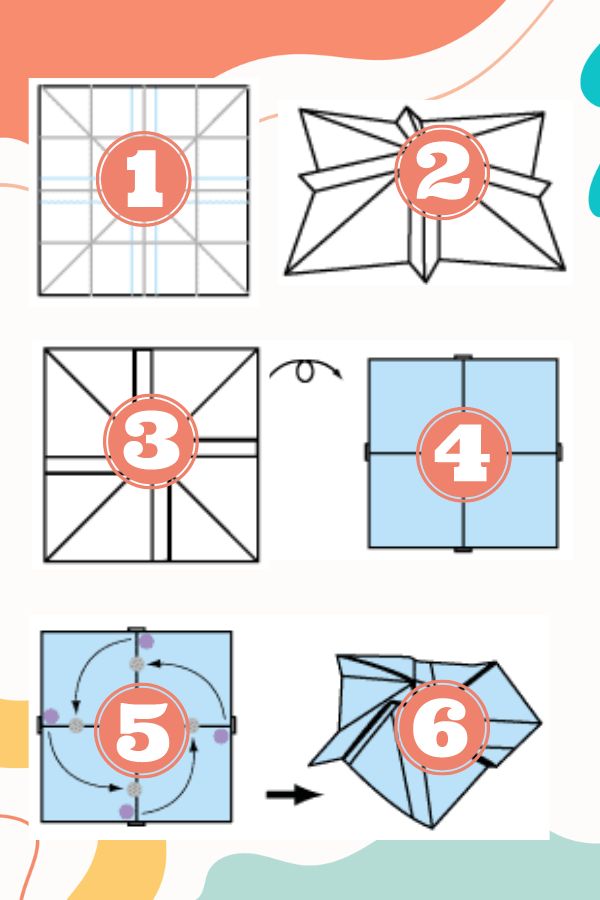
Create a Beautiful Origami Rose in Bloom with These Easy Folding Instructions
Learn how to create a beautiful origami rose with these easy folding instructions. You will need some materials and follow the step-by-step guide. The process involves creating base creases, making the star fold, folding up the bottom corners, opening the corner pocket, flattening the corner, folding in the inner corners, folding the opposite side, twisting the criss-cross pattern, and more. Check out the DIY Video Tutorial and Tips for Beginners to master this art!
Create a Timeless Rose for Your Valentine
Surprise your sweetheart with a heartfelt gift that will last a lifetime – an origami rose! Unlike real flowers, these roses never wilt and can be crafted into a stunning bouquet that will brighten any room.
To create the perfect rose, it is recommended to use heavier origami paper. Although this is a challenging origami, with patience and practice, you can master the steps and create beautiful roses with ease. Just be sure to watch out for that one tricky step and take your time to create sharp creases for the best result.